Do It Yourself! How to make your own Pilates Folding High Mat
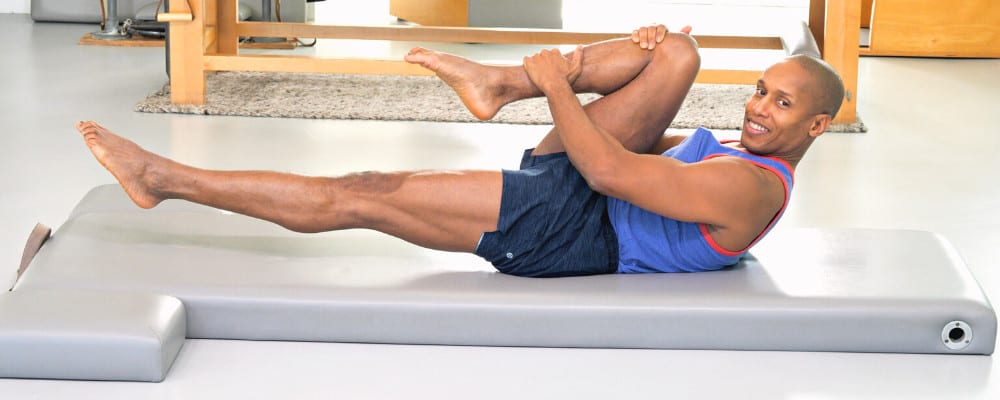
We’d like to thank Lauren Hammerle and her amazing husband Dave for sharing his instructions for building your very own Folding High Mat for only $210. Lauren happens to be a Pilates Instructor herself, as well as the mother of 4 and truly, one of the nicest people we’ve ever met. Visit her at: Precision Pilates Studio in Ridgewood, NJ, and check out her killer form in two of our most popular classes led by Kathi Ross Nash: Leg (Springs) To Die For and Designer Magic Circle (Lauren’s wearing a headband).
We want to hear about your own Pilates projects! Please send us your stories, comments and questions via our Contact page.
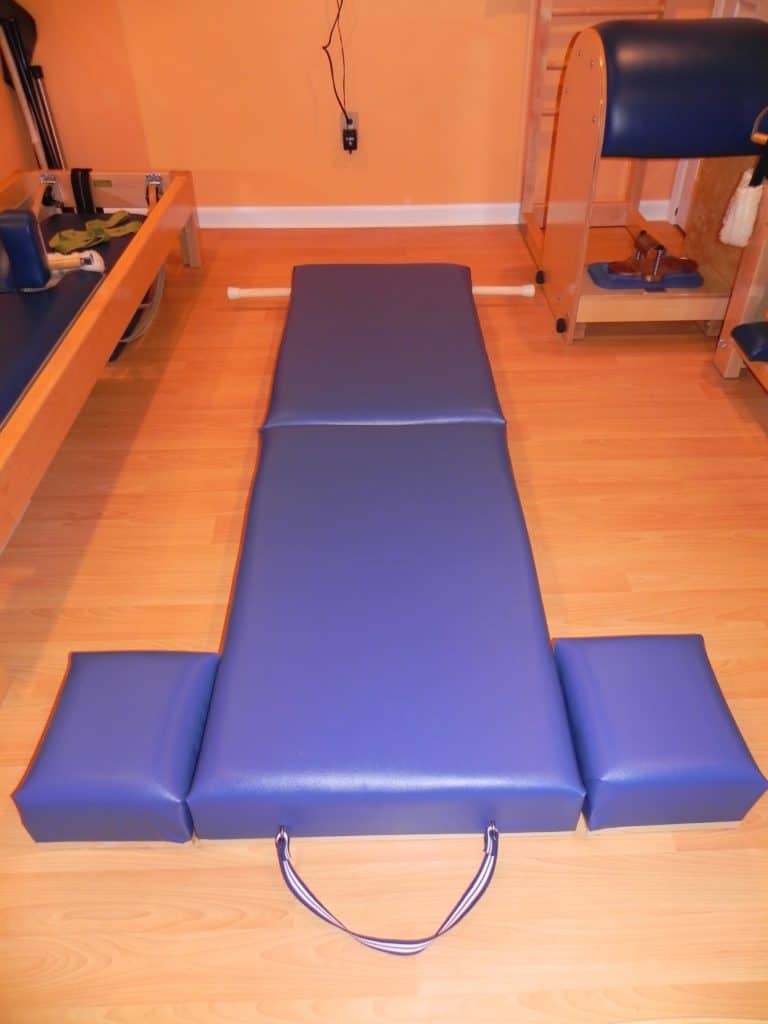
Dave & Lauren Hammerle’s Homemade Pilates Folding High Mat
While it’s hard to beat an authentic Gratz Pilates mat, you can make your own folding high mat and foot boxes pretty close to the original. We based our measurements on Gratz finished dimensions and tried to keep as close as possible along the way.
Notes:
- We opted to make our handles in two pieces rather than one dowel that runs all the way through (like Gratz). This was for our storage purposes. We also aesthetically left off the silver ring that Gratz uses to cover the vinyl where the wood dowel inserts.
- We used a high piece of foam with 3”. This makes the mat really soft, cushiony and makes the exercises challenging. It also adds a great chest opener when you are holding on to the handles! You may want a smaller inch of foam.
- The size of the foot boxes are smaller than Gratz. This is because of the one full size piece of foam that I purchased. The small discrepancy in foot box size is not notable.
Cost: $210
Time: One full dayʼs work
Materials:
From Joanne Fabrics:
- 3” foam – 1 full piece measuring 90”x24”, cut into 4 pieces. Sizes 40”x24” times 2 and 10”x12” times 2. Cut the 40” pieces first and you will be left with your one piece to cut in half for your 10”x12” (the foot boxes).
- Marine Grade Vinyl – 2 pieces measuring 54”x38” and 2 pieces measuring 24”x26”. If you buy the vinyl from Joanne Fabrics, make sure it is Marine Grade and the store will only cut the fabric in one direction. You may have to cut some pieces yourself. These measurements leave enough room to pull the vinyl taught over the foam and wood.
- Foot Strap – 1 piece of belting 24” long. I chose a strap that was 1 ⅛” wide and soft to the touch.
- Velcro, stickyback
From Home Depot:
- 3 x 24”x48”, ⅜” plywood precut. (If you are not making Foot Boxes, you need 2 pieces of plywood.)
- 2 x 1”x8” by 8ʼ No. 2 pine
- 1 x 3ʻx1 1/4” dowel
- 1 x small box 1”x5/8” drywall screw
- 2 x ¼” hanger bolts, one side is wood and one side is machine screw
- 2 x washers that fit ¼”
- 2 x hex nuts to fit ¼” hanger bolt (you may need to buy a full bag of 20 hex nuts)
- 2 x ¼”x ⅝” eyebolts and nuts
- 1 x 2 pack of 2 ½” non-removable pin hinge in zinc
- Double point staples, 9/16”
- 1x 2 pack ¼” white rubber leg tips
- 2x 8 packs of 1 ½” Anti-Skid pad circles
- 2 x 3” carabiners
- 1x small Elmerʼs Wood Glue, exterior
- Pushpins
- 1 small box 1¼” Brad Nails
- Silicone
Tools Needed:
- Table Saw
- Skill Saw
- Chop Saw
- Screw Gun
- Compressor, hose, nail gun
- Assorted size of Wood Drill bits, up to ⅜”
- Hammer
- ¼” ratchet
- Pliers
Instructions:
Mat: Rip on table saw 1x8x8ʼ pine down to 2 ¾” x 8ʼ. You will get two out of each board, which is 4 pieces. Set your chop saw to 45 degrees, cut 4 pieces 40” long to long. That takes up 2 of the 8ʼ pieces. Save leftovers. Next, cut 4 pieces 24” long to long out of the other two 8ʼ pieces. Cut 2 pieces 22 1/2” square. Cut plywood to 40”. Now take two 24” pieces and two 40” pieces and make a frame of 24”x40”. At each 45 degree joint, put glue, 2 finished nails and one screw in the middle. Glue the top of your frame which is 24”x40”, place plywood on glue. With an ⅛” drill bit, pre-drill pilot holes and screw every 5” or so around the entire frame making sure to put 2 screws on either side of corner an inch in or so. Put this aside and build the second half of the folding mat the same way.
Foot Boxes: With the leftover pine, cut on chop saw four 10” long to long pieces and four 12” long to long pieces. Take two 10” and two 12” pieces and make a 10”x12” frame the same way you did with the mat above. Cut the third piece of plywood to two 12”x10” pieces. Glue and screw plywood to frame in the same manner as above with mat.
Dowels: Cut dowel to 2 pieces measuring 10”. In the center of circle, pre-drill 3/16” hole and screw the point end of hanger bolt into dowel. You may accomplish this by taking ¼” nut and screwing that in completely on the machine side of the screw, all the way to the middle and using an adjustable wrench to screw in the wood part. Pick one of the mat boxes, measure from corner on 40” side –2“, make a mark. From bottom of box up towards plywood, measure 2 ⅜”, which is center of your ⅜” hole. Drill hole through the pine. Do the same thing to the opposite corner of the 24” side.
Eyebolts for Foot Strap: With other mat box on one of the 24” sides, measure 5 ½” from each corner, 2 ¼” up from the bottom. Drill two ⅜” holes.
Foam and Vinyl:
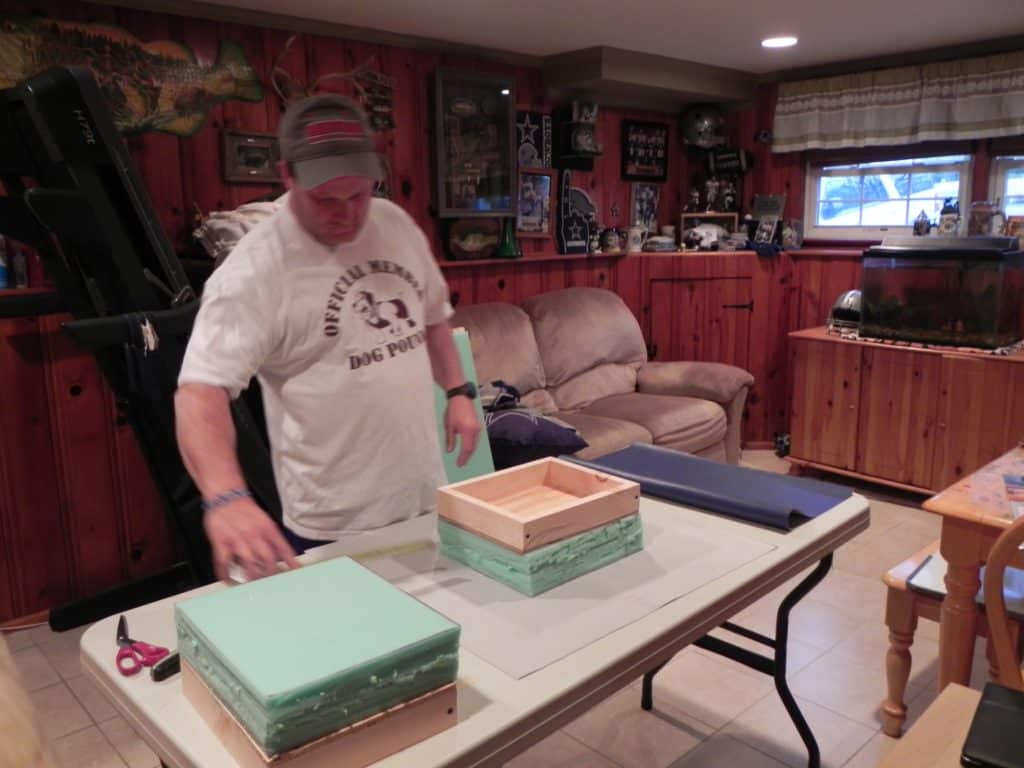
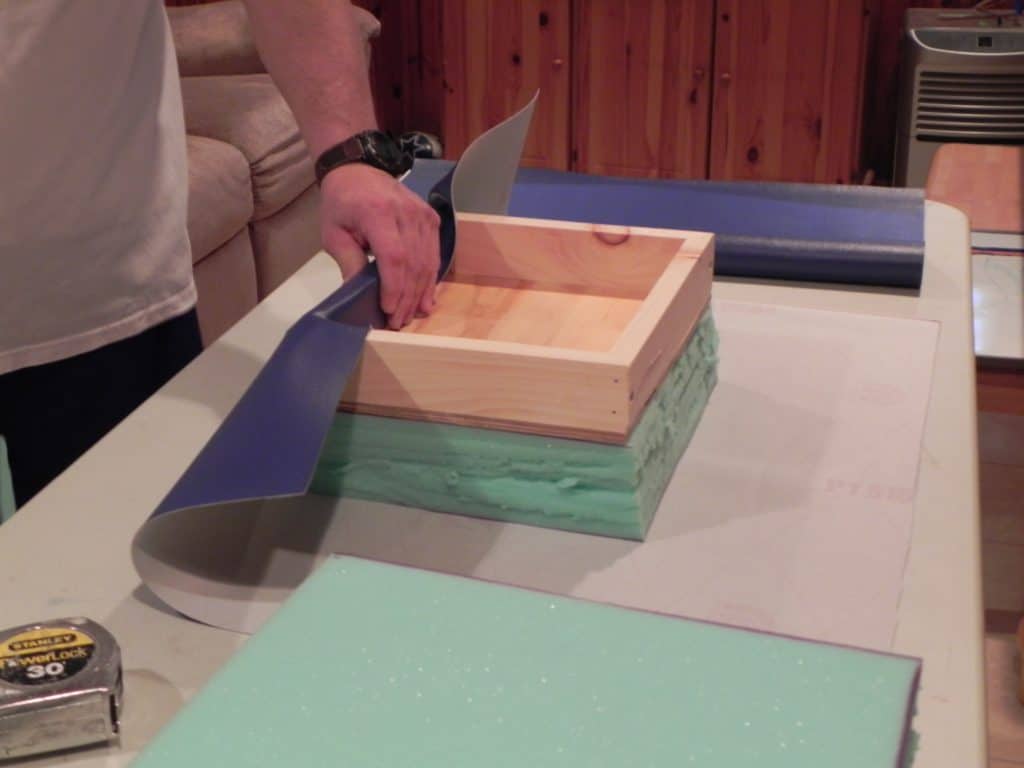
Start with covering a foot box in vinyl. Take 1 foot box, 1 foam and 1 vinyl, put the vinyl good side facing down on a flat surface (table), put foam and then plywood side down onto foam. Center everything. It should be approximately 7” in from each side.
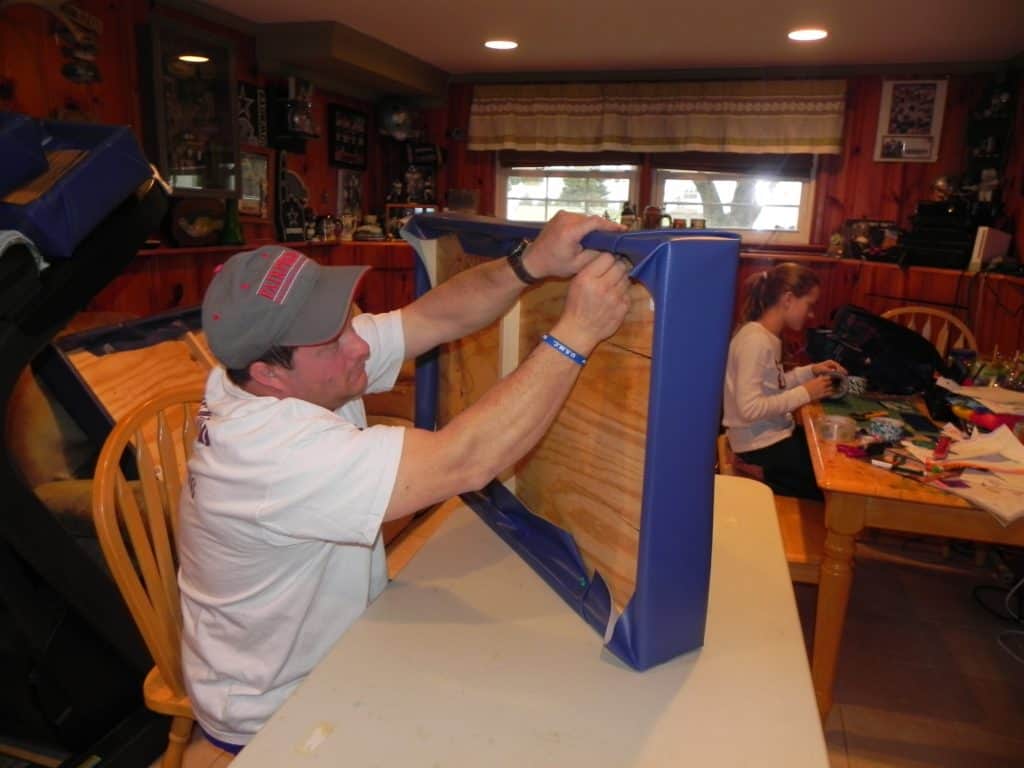
Fold the vinyl (like a present) over the foam and base, tucking it inside and tack it with the pushpins. Be sure to pull taught to round the edges on all 4 sides. Be patient. This process might be the hardest part. Temporarily tack it with pushpins. There is no right or wrong way to do it. Use your preference on what looks good when folding. Flip over and exam to check if you like it. If it looks good, set it aside. Do the same thing to the other foot box. Repeat this for the Mat boxes. If it all looks good, take the 9/16” staples, replace pushpins with staples to the interior of pine wall where the pushpins were. Be sure to nail staple first and then pull pushpin. (Donʼt staple into plywood. Staple in pine frame.) When folding the vinyl try to keep the fold away from the dowel holes.
Eyebolts: Locate holes for eyebolts. Take the point of a razor knife or scissor and puncture the vinyl. Feed the eyebolt through. Tighten with the nut that comes with it. Repeat for other eyebolt.
Hinge: Take the two mat boxes and fold them bottom side together (or what you may consider the wrong side), so vinyl is on outside (as if you were folding up your finished mat). Making sure the eyebolts and dowel holes are on the same side. On the opposite of that, is where you will put your hinges-the hinge side. On your hinge side, measure 4” in from the end on the two pieces, making 4 marks. Two on one mat and two on the other half of the mat. Separate the mat halves an inch. Take the barrel of the hinge and make it flush with the bottom side of the mat so that when the mat is open, the barrel part of the hinge is not on the ground. Do the same thing for the other hinge on the other side. Screw the two hinges onto eyebolt side first, making sure to keep the barrel part of the hinge flush with the bottom edge of the box. Put the other mat box 90 degrees to the first box, screw hinges in, making sure to keep barrel edge of hinge flush with the bottom edge also.
Anti-Slip pads: Cut anti-slip pads in half. Turn mat over and attach pads to all 8 corners and space throughout bottom, leaving 4 pads to cut in half for the foot boxes.
Dowels: Locate holes for dowel handle. Puncture vinyl, feed screw end of dowel into hole in frame, put washer and ¼” hex nut and tighten. Do the same to the opposite side. Take silicone and squeeze it into the rubber tip and press into the dowel handles. Not too much silicone so that it does not ooze out. Just coat the bottom of the rubber.
Foot Strap: Attach the 2 carabiners to the eyebolts. Take the Foot strap and stickyback velcro. Attach one piece of the velcro to the end of the strap and the other velcro about 2” away. Do this to both ends of the strap. You then have a small ʻloopʼ to attach the strap to the carabiner. This strap can easily come off to be washed. You can also use your sewing machine instead of the velcro. Next time I pull out my sewing machine, I will most likely remove the velcro and sew the strap instead. It will be sturdier than the velcro and is still removable to be washed. But, the velcro also works!
Enjoy making your own Pilates Mat!
Tags: Pilates, Lauren Hammerle, DIY, Folding High Mat, apparatus, instructions

Maria Hammond
Hi love that you have this to follow!! i cannot find anywhere to buy these beds, and i will be needing Pilates equipment for my studio, so i thought i would have a go at making one while on ‘recovery’ for 6 weeks!! I have one question, i dont want to make it a folding bed, i assume that is not hard to convert. 🙂
Maria!
Posted May 17, 2016 |
Alisa Wyatt
Member since 2011
Not hard at all! Just purchase the wood for the main bed in 1 piece instead of 2 or if you want to keep it really simple, don’t use the hinges but do everything else the same. Have fun and send us pics of your project so we can share them! alisa@pilatesology.com
Posted May 17, 2016 |