
DIY Swedish Bars

Lauren Hammerle’s husband Dave is back at it with another awesome DIY Pilates Apparatus Project! He made Lauren a High Mat that folds for storage as a surprise Christmas gift. This time it’s Swedish Bars…
With a few supplies from your local hardware store you can affordably expand your Pilates Studio in one weekend. DIY Swedish Bars are a simple and easy project. Start your project today and you can be hanging like a Bat tomorrow!
by Dave & Lauren Hammerle, Precision Pilates Studio, NJ
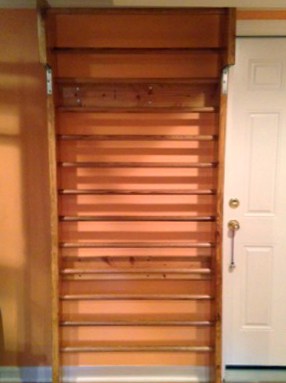
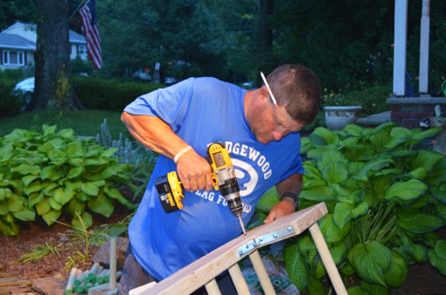
Swedish Bars have, so far, been an elusive piece of apparatus in my studio. I always felt my studio was too small to accommodate the unit, until I realized the possibility of having a set custom built. I mentioned this to my husband Dave, a carpenter, and he built one in about 2 hours. It took him more time to stain the Bars than to actually build it! The whole project cost just under $200, and it fits perfectly in my studio after all!
Finished size: 7’h x 37 1/2”w
Materials:
- 13 – 3’ x 1 1/4” Oak dowels
- 3 – 2 x 6 x 8 Kiln Dried Douglas Fir
- 2 – 1ft pieces of 2 x 6 x 8 Kiln-Dried Douglas Fir (for pull up bar)
- 1 – Irwin Speedbor 1 1/4” Woodboring Spade Drill Bit
- 2 – L-brackets 4.5” x 4.5”
- 2 – Straight brackets with holes 9”
- 1 – box of 2 1/2” wood screws for holding dowels
- 1 – bag of bracket screws for mounting L-brackets and backing plate
- 1/8” Wood drill bit for pre-drilling holes 1 size smaller than screws
- 1 – 2×6 Kiln Dried Douglas Fir for the backing board
- 8 – 3/8”x4” lags (used for mounting unit to wall)
Directions:
- Cut two 2x6s to height dimension. The leftovers are then used for the pull-up bar (approximately 1’).
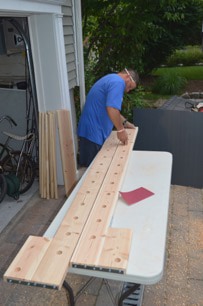
- Laying out where the holes will go, start 10” off the bottom and 2 3/4” setback from front edge. This will be your center line. Then measure every 6” from that point. Keep the 2 3/4” setback. You are using 12 dowels. Do this for both 2×6 boards.
- Drill holes 1” deep at these 12 points marked on each board. At this point, attach the 1 foot 2x6s front boards for the pull up bar using the L bracket and straight bracket, making sure to keep both top of boards flush.
- Center brackets on the edges of the 2x6s.
- In the most outer corner, mark a centerline 2” down and 2” in from the outside of the 2×6 on both boards. This becomes the center of your pull up bar. Drill that 1” deep also.

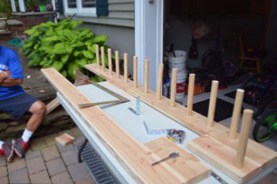
- Laying one section flat on a table with the holes pre-drilled facing up, insert 13 dowels using a block and hammer to make sure they are snug. Lay the top board over the dowels and line up the holes using the block and hammer, tap the top board down until secure. Lay the whole unit down on its back.

- Remeasure 2 3/4” off the front edge, 10” up and then every 6” where the center of dowels are, pre-drill 1/8” hole into center of dowel and screw together with 2 1/2” course thread wood screw. This is being done on the outside of the frame to secure the dowels.
- Flip the unit over so the pull up bar is facing down (back side is up), measure across the back edge from outside of 2×6 to outside of 2×6 and cut out of remaining 2×6 two pieces that equal that dimension. You are making the part that attaches the unit to the wall.
- Measure up from bottom edge, 25” and 64” on both 2x6s, place bottom edge of 2×6 that you cut flush to the outside edge of the back at the 25” mark. Pre-drill with the 1/8” bit, three holes on each side. Attach with 2 1/2” course thread screws.
- Repeat for the 64” mark.

- Sand everything down.
- Stain the unit to color of choice. Let dry for 24 hours.
- Apply three coats of polyurethane following directions on can.
- Once dry, hang unit from the mounting boards on back of unit. Find studs in the wall (usually 16 on center), pre-drill mounting boards one size smaller than a 3/8” x 4” lag. Mount to wall.
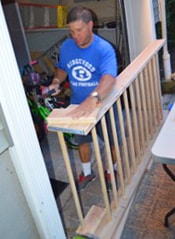
Let’s hear it for Lauren’s husband Dave! For more projects like this one, check out our DIY Studio Apparatus section. And don’t forget to send us pics if you attempt a DIY project! How about a Pedi-Pole? Sunni Almond, is Scott up for the challenge?!
Tags:
From the Community